
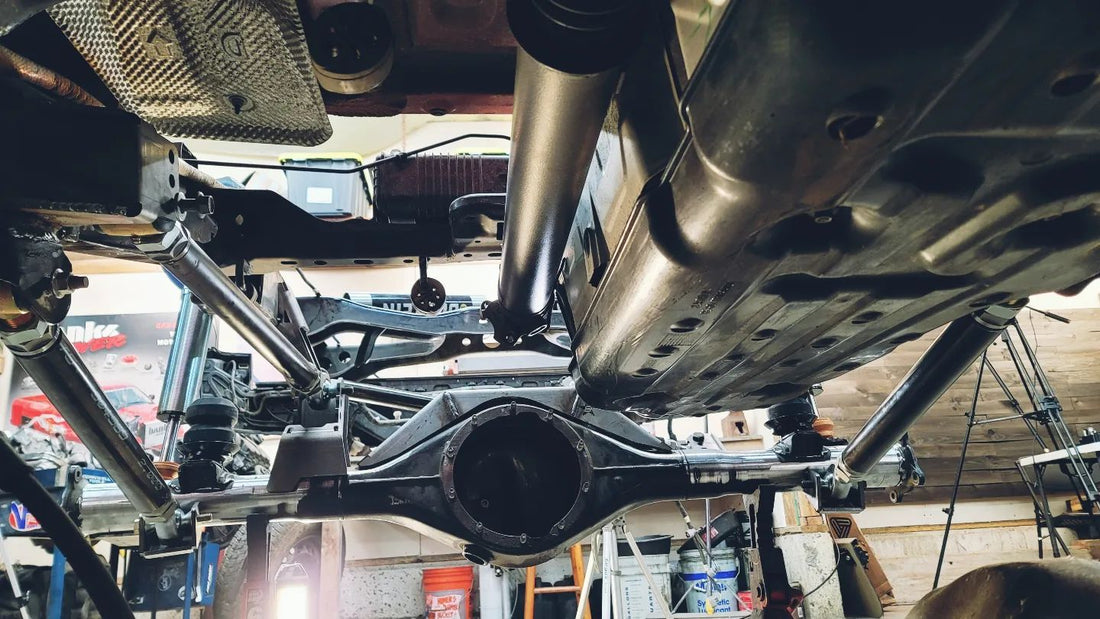
A three link suspension kit is adaptable for many settings, but especially perfect for front suspensions because they can fit easily around your rig’s drive shaft, exhaust, oil pans, and other obstacles that may not work with a four link or leaf spring setup. In the following article we'll share some installation tips to facilitate your upgrade work.

Three Link Suspension Kit
Install Tips
Panhard or Trackbar: The panhard on a 3 link is the part that is used to hold the axle side-to-side within the vehicle. If your vehicle has a steering box, the panhard should follow the drag link as close as possible. It should also be the same length and angle as the drag link, and the mounting points should be the same height. These adjustments will minimize bump steer.
When the vehicle doesn’t have a steering box (like on a rig with full hydro), the general rule is to make the panhard bar as long and flat as possible to reduce side-to-side shifting of the axle. It is also ideal to mount the panhard as high as possible (within packaging constraints). The center of the panhard is the roll center (where the body rolls side-to-side) on a 3 link suspension. By making the panhard center higher, you can reduce body roll and increase stability. Panhard bars see a good bit of force, so it is best to use ¼” tubing and either ¾” or ⅞” heims. It is also a good idea to plate the frame rails where the frame side mount attaches.
Lower Links: The lower links in a 3 link suspension are typically easy to setup and some general rules of thumb can make the process even smoother. Triangulating lower links is fairly common because it takes some load off of the panhard and lowers the roll axis, therefore reducing flex steer. Furthermore, flatter and longer lower links (at ride height, when viewed horizontally), with an ideal length of two times the wheel travel, will generally behave better. For example, a 36”-42” link is fairly common in rigs with a wheelbase long enough to accommodate the size. Note: Longer links will always be easier to bend, no matter what type of material is used.
Upper Links: The upper link in a 3 link suspension can be difficult. Regarding length, there are some old and new rules of thumb. In the past, it was recommended to make the length 75% of the lower link length. Yes, this will keep your suspension geometry consistent during travel, but it can also cause the pinion angle to aim downward as the suspension droops. Instead, making the upper link the same length as the lowers (or even slightly longer) will allow the pinion to roll up along with the droop. Overall, equal length keeps the driveshaft alive and is especially useful for rigs with short wheelbases and/or driveshafts, or for low-pinion front applications.
Separation: Link separation affects many of the handling characteristics of a vehicle, making it a crucial aspect of proper 3 link suspension fabrication. For vertical separation at the axle end of your rig, try for at least 25% of your tire size. For example, a 40” tire should have at least 10” of separation. Note: This isn’t always possible and installing links will require compromises. On the frame end, vertical separation controls anti squat, or anti dive (in the front). Anti squat often comes down to driver’s preference. If the frame-side separation is the same as the axle, the vehicle will have 0% anti squat; in other words, the vehicle will have no resistance against the body squatting in the rear (while accelerating), or in the front (while braking). In many cases, drivers do not like this. Anti squat can be added by making separation at the frame less than at the axle. Horizontal separation at the axle is usually set by pushing the lower links out as far as you can, while keeping enough clearance for your tires and steering. Additionally, wider lowers at the axle will help with stability. On the frame side, the lowers need to be inwards far enough to allow for tire clearance at full lock. Some drivers like more triangulation, but that is also a matter of preference.
Potential Fabrication Challenges
Even though a 3 link is ideal for installation on vehicles that may have some belly-side clearance issues (e.g., oil pan, steering components, etc.), you can still run into obstacles that require compromises along the way.
Fabrication Experience Required
Installing a three link suspension requires advanced off-road fabrication experience that includes welding and cutting.
Tools Needed
The tools needed for installation include: eye and face protection, a power saw, grinder, welder, jack stands with floor jack, tape measure, angle finder, and level.
Special Product Details
Although they are much simpler to install than other suspensions, 3 links are still suitable for hard core use like rock crawling and also perform well during hard accelerations and around hard corners. Barnes’ 3 link suspension kits come with all of the heavy duty parts you need for installation, including mounts, tube inserts, pre-drilled brackets, and more.
Applicable Vehicle Makes and Models
Since a three link suspension can be completely customized, Barnes 4wd should be able to provide all of the off-road parts you need to fabricate a 3 link system on your 4x4.
Additional Off-road Parts
If you’d rather upgrade to a 4 link system, check out our 4 Link Suspension Kits. Otherwise, feel free to give us a call at (828) 551-7616 or email sales@barnes4wd.com with any questions regarding parts or installation.